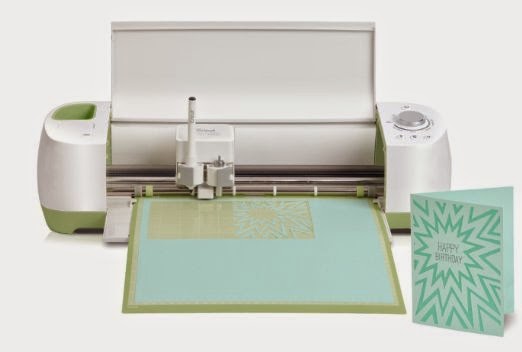
Good morning. Today we are going to make a simple window card using our Gypsy. After a couple of emails and comments on the message board I decided to re-visit and make a video rather than a photo tutorial. Now you can make this card right along with me and then link it up at the bottom of this post. We will use Gypsy Wanderings so that everyone can follow along and make this easy card. The 3rd video will offer a more complex window card followed by a photo tutorial for putting the card together.
So now get your favorite drink, and turn your Gypsy on and let's get to work.
I used a sheet of double sided K and Company paper and then some white scraps I had for the inside of the card, I didn't use the one in the tutorial as I had the perfect size already cut.
After my card was cut I scored it.
Folded it.... remember bring the back to the front as your front is the weaker side.
I got this done just in time to leave for work so I packaged it (2 cards) up and took 15 minutes on my lunch to put them together.
See how simple this one is.... I expect all you Gypsy newbies to do this card! and for you old timers well who couldn't use another and I could use some color ideas so be sure to link up your cards too.
This is my card all put together.
I used the I rock to add a little blink, I mean you can't have a card that is without right?
Now doesn't that look better?
And the inside looks good too.
This is one of the cute little birthday cards I made for two of our designers. I used Tim Holtz for the base of the card, and DCWV for most of the rest and scraps for the balance.
After cutting the card I scored it.
Then I pulled the base of one of my cupcake cuts apart for the base of the cupcake and put them together. I used the Cuttlebug on the top with the Swirl pattern.
This is before adhering as I always double check to make sure the pieces fit.
After embossing I added gems for sprinkles and white stickles to my the frosting glisten.
I ran the bottom of the cupcakes through the Xyron.
Here is the inside of the card. I love the lined paper, it was so easy to write on.
And the finished cards.
I just love having a card stash, it makes it so much easier to just reach in and grab when the need arises!
That's it for today and I want to thank you for spending time with me, I sure hope you learned something new and enjoyed today's projects. Wasn't it a lot easier than you expected to make that card?
Thanks for your continued support and sweet words of encouragement. Your comments are what inspire me to share with you.


22 comments:
I love your tutorials I have had my cricut just over a year but my gypsy I got a few weeks ago for my birthday from my DH and kids. Your vidoes have greatly helped my understanding of what I can do with the gypsy and how. Please keep up the goodwork.
Forgot to ask where you got the little flower gems you applied with your i-rock. I have only seen individual round gems. I have ordered an i-rock bundle from Oh My Crafts but they dont appear to have any little flowers. If you can direct me somewhere I would appreciate it.
Liz those are seven individual stones put on one at a time.
Oh thats clever, did you start in the middle?
Love your window cards!!!
love these type of cards you are making. they are super cool and pretty. tfs!
All you need to do is possition allstone where you want them then attach ... simple but effective.
Thank you so much for these videos that you are doing. I look forward to them each Saturday morning. I did the "smile" card along with you but thank goodness there is a pause button so that I can refer back to the instruction manual to see what buttons you are using, figure it out and "catch" up! I have Design Studio and have mastered it and hopefully I'll be able to do the same with my Gypsy. I've only had it for about 2 weeks and am still lost with it. Which brings me to a question: Is there any way that you can show what buttons you are pressing for each step while you are doing the video or is this asking too much? If it is I'll just keep doing what I have been and hopefully I'll figure it out sooner or later. I'm going to try and make a Halloween card using this video and if I can figure out how to post it when I'm done I'll do that. Thanks again for all your time in helping us "newbies" master the Gypsy!
Susan from Madison, Alabama
Shelia, you are just so amazing with that gypsy and I so enjoy your videos. I have to go to Napa to see my Aunt, but hoping to try to make one tonight or tomorrow and link it to your blog. Thanks so much for taking the time to do your videos. hugs
This is awesome Sheila!!! Gorgeous work, and I can definitely vouch for that! I got my bday card in the mail yesterday and just adore it! I have it displayed in my home! Thank you so much for thinking of me and for the notecards! You are the sweetest!
Fabulous tutorial too! I definitely want to give this a try sometime!
That is too cute! thanks for sharing
What a wonderful tutorial! I followed along with you and created my own! I will cut mine and post it soon. I just got my Imagine and am waiting to be able to use it with my Gypsy. If the update doesn't come soon for that, I'll get my Expression out again so that I can cut this card!! Thanks again for sharing your expertise with us!! I look forward to this every Saturday!
Great card Thanks for sharing I will definitely get a window card made and post it on your site as soon as I get a chance I work tonight but maybe I can design it tomorrow or the next day! Also just wondering if you think the I rock tool is worth the money I really want one but had someone tell me that it doesn't get hot enoug? Any input would be great TIA!
Sheila - awesome tutorial - love your videos!! Beautiful cards!!
Sheila, I am just loving your video tutorials. I'm one of those who have had my G for a long time but never use it. Guess I am intimidated, but your videos are WONDERFUL! I will try to make a card and post it here. Thanks so much for sharing your talent with us.
DebbyS
Thanks for this feature, Sheila. My Expression and Gypsy are brand new, and I really appreciate the opportunity to learn to do some fun things with them!
I tried to link my card and I can't get the linky to work. :-(
I finally got it to link... thanks Shelia.
Just got my card linked up! I had to say 'WOW'!!! All of you have done such a fabulous job! Look at all of these beautiful cards!
Love this tutorial Sheila! I've already got 2 other windown cards in the works! :)
So when you write your message on the inside paper, it shows...is there any fix to that?
azcat2002 at msn. dot com
Thank you for your question. I like mine open, however use a folded sheet on the inside of the card as shown on this feature:
http://shesasassylady.blogspot.com/2010/09/you-quack-me-up.html
I sure hope that helps you. Have a great day and thanks for spending time with us today.
Sheila
Thanks for your great tutorials, I'm learning a lot now. I will visit your blog a lot more in the future
Hug Linda
Post a Comment